How to Sharpen a Knife: A Practical Guide to Every Method
Sharpening a knife means grinding the blade's edge against an abrasive surface to remove metal and form a new, thinner cutting edge. You can do this with a whetstone, a honing rod, an electric sharpener, or a pull-through device. Each works differently, and the right choice depends on your knife, your budget, and how much control you want over the result.
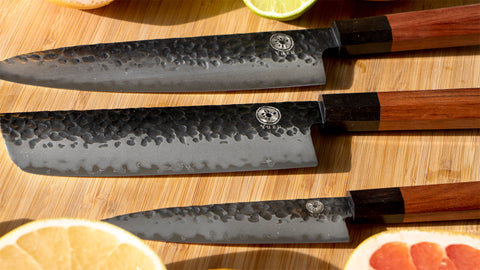
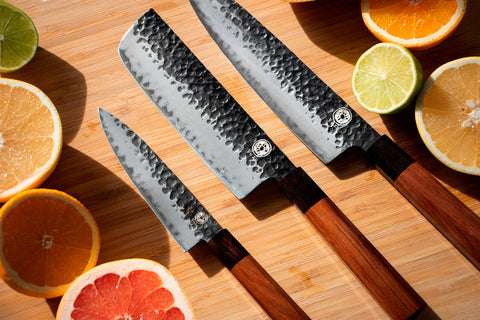
A sharp knife cuts cleaner, requires less force, and is actually safer to use. When you push harder to compensate for a dull blade, you lose control, and that's when accidents happen. Whether you're maintaining a Japanese chef knife or freshening up a Western workhorse, the principles are the same. The details just shift depending on steel hardness and blade geometry.
How do you know your knife needs sharpening?
A few clear signs tell you when the edge has gone:
- The tomato test. Press the blade into the skin of a ripe tomato without applying downward force. A sharp knife bites in and slices cleanly. A dull one slides off or crushes the skin before cutting.
- The paper test. Hold a sheet of printer paper by one edge and draw the knife downward through it. A sharp blade cuts smoothly. A dull one snags, tears, or won't catch at all.
- The onion test. Slice an onion. If your eyes water more than usual, the blade is crushing cells rather than cutting them cleanly, which releases more of the compound that makes you cry.
- Visual check. Hold the blade under a bright light with the edge facing you. Dull spots reflect light as tiny bright lines or dots along the edge. A sharp edge is too thin to reflect anything.
If you cook daily, you'll probably notice the knife slowing down every few weeks. That gradual dulling is normal. Regular honing delays it, but eventually you need to actually sharpen.
Sharpening vs honing: what's the difference?
People use these terms interchangeably, but they describe different things.
Sharpening removes metal from the blade to create a new edge. It's what you do when the knife is genuinely dull. Whetstones, electric sharpeners, and pull-through devices all sharpen.
Honing straightens the existing edge without removing significant material. Over use, the thin metal at the cutting edge folds over or bends out of alignment. A honing rod pushes it back into place. The knife feels sharper afterward, but you haven't ground a new edge.
Think of it this way: honing is weekly maintenance, sharpening is the occasional reset. If honing stops making a noticeable difference, it's time to sharpen.
What sharpening method should you use?
Each method has trade-offs. Here's a quick breakdown before we get into the details:
| Method | Control | Speed | Best for | Risk |
|---|---|---|---|---|
| Whetstone | Full control | 10-15 min | Japanese knives, anyone who wants the best edge | Requires practice |
| Honing rod | Moderate | 30 seconds | Maintenance between sharpenings | Low (doesn't remove much metal) |
| Electric sharpener | None | 1-2 min | Western knives, convenience | Removes too much metal, fixed angle |
| Pull-through | None | 1 min | Emergency touch-up | Aggressive, can damage hard steel |
For Japanese kitchen knives with harder steel (HRC 58-60+), a whetstone is the right tool. Electric and pull-through sharpeners use fixed angles that are typically too wide for Japanese blades, and their aggressive abrasives can chip harder steels like AUS-10. Whetstones let you match the exact angle your knife was ground at and control the pressure.
How to sharpen a knife with a whetstone
Whetstone sharpening gives you the best result because you control everything: angle, pressure, how fine you finish. It takes 10-15 minutes once you've got the technique down.
The basic process:
- Soak the stone in water for 5-10 minutes until bubbles stop rising.
- Start on the coarse side (around 1000 grit) for regular sharpening. Use 400 grit only if the knife is chipped or very dull.
- Find your angle. Japanese knives sharpen at 10-15 degrees per side. Western knives at 17-22 degrees. Place two fingers on the flat of the blade near the edge to hold the angle steady.
- Make consistent passes. Draw the blade across the stone from heel to tip in a sweeping motion. Apply moderate pressure on the forward stroke, lighter pressure on the return. Aim for 20-30 passes per side.
- Check for a burr. Run your thumb gently across (never along) the edge. You should feel a slight roughness on the opposite side from where you were grinding. That burr means you've reached the edge.
- Flip and repeat on the other side until a burr forms there too.
- Move to the fine side (3000-6000 grit) and repeat with lighter pressure. This polishes the edge and removes the burr.
- Clean and dry both the stone and the knife. Rinse the stone under running water and let it air dry before storing.
For a deeper walkthrough covering grip, pressure, and common mistakes, see our complete whetstone sharpening guide. And if you're not sure what angle to use, our sharpening angle guide breaks it down by knife type.
A dual-sided whetstone with 1000 and 6000 grit covers most sharpening needs. One stone, two grits, no fuss. If you want to compare water stones, oil stones, and diamond plates before buying, our guide to sharpening stones covers the options.
How to hone a knife with a honing rod
A honing rod (sometimes called a sharpening steel, though it doesn't actually sharpen) straightens the microscopic burr that forms along the cutting edge during normal use. Use it before or after each cooking session to keep the knife performing between proper sharpenings.
- Hold the rod vertically with the tip resting on a stable surface like a cutting board.
- Place the heel of the knife near the top of the rod at your knife's sharpening angle (15 degrees for Japanese knives, 20 for Western).
- Draw the blade down and across the rod in one smooth motion from heel to tip.
- Alternate sides. Five to ten passes on each side is plenty.
Use light pressure. You're realigning metal, not grinding it away. If the honing rod stops making a difference, the edge has worn down past what realignment can fix. Time for the whetstone.
One important note: ceramic honing rods are slightly abrasive and do remove a small amount of metal. They sit between a traditional steel rod and a whetstone. Fine for occasional use, but not a replacement for proper sharpening.
Should you use an electric or pull-through sharpener?
Electric sharpeners and pull-through devices are fast and require no skill. You draw the knife through a slot, and spinning abrasive wheels or crossed carbide blades grind the edge for you. For a basic Western kitchen knife that gets moderate use, they work well enough.
But there are real drawbacks:
- Fixed angles. Most set the angle at 20-25 degrees per side. That's too wide for Japanese knives, which are designed for 10-15 degrees. Sharpening at the wrong angle changes the blade geometry over time.
- Aggressive material removal. They take off more metal per session than a whetstone would. Over months, this shortens the blade's life noticeably.
- Hard steel risk. Japanese steels like AUS-10 (HRC 58-60) are harder than Western stainless (HRC 54-56). Pull-through sharpeners with carbide blades can chip the edge of harder steels rather than sharpening them cleanly.
- No progression. You can't start coarse and finish fine the way you can with a whetstone. The result is a functional edge, not a refined one.
If you own Japanese knives, avoid electric and pull-through sharpeners. A whetstone takes more time, but it's the only method that matches the blade's original geometry and produces a clean, lasting edge.
What angle should you sharpen at?
The angle determines two things: how sharp the knife gets and how long the edge lasts. Lower angles produce sharper but more fragile edges. Higher angles are more durable but cut less precisely.
- Japanese double-bevel knives (gyuto, nakiri, petty, santoku): 10-15 degrees per side
- Western kitchen knives (German, French): 17-22 degrees per side
- Heavy-duty knives (cleavers, outdoor knives): 22-30 degrees per side
Yuzu knives come sharpened at 15 degrees per side, which is the sweet spot for AUS-10 steel. Hard enough to hold a thin edge, tough enough not to chip under normal kitchen use. When you resharpen, match that factory angle.
Holding a consistent angle is the hardest part of freehand sharpening. The angle guide linked above covers how to find, check, and hold the right angle for any knife.
How to test if your knife is sharp
After sharpening, test the result before you start cooking with it:
- Paper test. Hold a sheet of paper by the top edge and slice downward. A properly sharpened knife cuts cleanly without tearing or catching.
- Tomato test. Place the blade on a tomato skin and let the weight of the knife do the work. It should bite in without pressure.
- Fingernail test. Gently rest the blade's edge on a fingernail at about 45 degrees. A sharp edge catches and holds. A dull one slides off. Be careful with this one.
The paper test is the most practical for home cooks. If the knife glides through a sheet of printer paper without resistance, you're done.
How often should you sharpen?
It depends on how much you cook and what you cut. As a rough guide:
- Hone before or after every cooking session (30 seconds)
- Sharpen every 2-4 months for daily home use
- Sharpen every 1-2 months for professional kitchen use
Harder steels like AUS-10 hold their edge longer than softer Western stainless, so you'll sharpen less often. But when you do, a whetstone is the right tool because harder steel responds better to the gradual abrasion of a stone than the aggressive grinding of electric sharpeners.
Between sharpenings, proper care extends the edge: hand wash and dry immediately, use a wooden or plastic cutting board (glass and ceramic boards wreck edges fast), and store in a wooden saya or magnetic rack rather than loose in a drawer.
Common sharpening mistakes
A few errors come up repeatedly, especially with beginners:
- Inconsistent angle. This is the most common problem. If the angle changes mid-stroke, you grind a rounded edge instead of a flat bevel. Focus on locking your wrists and moving from the shoulders.
- Too much pressure. Let the stone's abrasive do the work. Heavy pressure doesn't speed things up. It gouges the blade and wears the stone unevenly.
- Skipping grits. Jumping from a 400-grit stone straight to 6000 leaves deep scratches the fine stone can't remove. Go 400, then 1000, then 3000+. Or just start at 1000 if the knife isn't chipped.
- Not checking for a burr. The burr tells you when to stop grinding one side and switch. Without it, you're guessing whether you've reached the actual edge.
- Sharpening when you should be honing. If your knife went dull gradually during normal use, try the honing rod first. Many people sharpen too often and remove metal they didn't need to.
- Using the wrong method for the steel. Pull-through sharpeners and electric grinders can chip harder Japanese steels. Match the method to the knife.
Keep your knives working
Sharpening is one of those skills that seems intimidating until you actually do it. A decent whetstone, the right angle, and 15 minutes of practice is all it takes to bring a dull blade back to life. Once you've done it a few times, it becomes routine.
Start with honing after each use. When honing stops helping, reach for the whetstone. Match your knife's factory angle. Check for a burr. Move to a finer grit. That's the whole process.
If you're new to Japanese knives, the whetstone guide linked in the sharpening section walks through every step with photos and common mistakes.